Tuesday, January 31, 2012

Adult Tuna Salad


Hi all,

I love a good sandwich. It's so easy to get stuck in the cold cut rut, just eating deli meats on sandwiches. This does not have to be your lunchtime destiny- there are countless "salad" options for sandwiches. Personally, I'm a fan of tuna salad, chicken salad, and egg salad. Weird thing about me, though, is the fact I don't really like mayonnaise. It kinda grosses me out (it's anonymous congealed fat if you think about it). It can taste good and I ate a lot of sandwiches with the thin film of mayo that made packed lunch sammies soggy by recess. . .but when I started making my own sandwiches I abandoned the goop. Naturally, there is a conundrum: how can I enjoy tuna salad if I'm anti mayo? Well, silly, there is such a thing as no mayo tuna salad. Shocking, but I promise it's good. Give it a whirl!

Adult (No Mayo) Tuna Salad

1 pouch (2.6 oz is what I use) white albacore tuna (in water)
1/2 cup diced onion
1-2 tablespoons olive oil
1 teaspoon dried parsley
half a lemon
1 tablespoon sweet pickle relish
salt and pepper

1. Heat olive oil in saute pan over medium heat. Once pan is hot, dump in onions. Stir around, until onions start to brown slightly. This will take about 5 minutes. We aren't trying to caramelize these onions, so no need to cook them that long. Sprinkle in the parsley, making sure to crush the parsley flakes by rubbing between your fingers (this helps the flavor come out because it'll release oils, or something like that). Stir to mix the goodness. Squeeze some lemon juice over the onions while they are still hot. No need to use all the juice of the half lemon (unless you like a lot of lemon in your tuna salad). Let onions cool.
2. After onions are cool (can be warm, just not hot as if they came straight out of the pan), mix the onion mixture with the tuna and the pickle relish. Add salt and pepper to taste. Add more lemon juice if you like more acidity.
3. Serve over a toasted roll/bun OR a nice butter lettuce salad mix OR both (butter lettuce with tuna salad on a bun yum). This is quite tasty on its own too.
4. Enjoy. 

I'll try to post more than once a month. kthanksbai

<3HK

Sunday, January 8, 2012

Homebaked Pizza: PestoRomaBella

The TJ's pizza dough on floured surface, ready for Bethany

Adding the fresh mozzarella

Dotting the top with TJ's Pesto, Bethany's idea!!!

Voila! Homebaked pizza with homemade honey lemonade!
I have a thing for pizza. I assure you it has nothing to do with the fact that I'm from New York...and more related to the fact I love yummy things. So, after one of my housemates last year Megan made a pizza, I was totally inspired to do the same. I chanced upon Trader Joe's and decided that the best thing to do was buy some garlic herb pizza dough. What happened next pretty much changed my life.

I had fresh mozzarella, baby bellas, a roma tomato, and pesto on hand. Obvi it clicked: these would be toppings for an insanely good homebaked pizza. I don't deserve to call it homemade since Trader Joe made the dough....but it was baked here in my house and that should count for something, right? PS it's basically against my food mantra to eat out of a box or cook out of one for that matter, but sometimes rules are made to be...adjusted for special cases like awesome premade pizza dough. Ok, enough of the justification game- on to the recipe.

Here is it. I invited my friend Bethany over to make this pizza with me so we could eat, drink (lemonade) and be merry. Thank you for all your help if you see this Bethany!

Homebaked Pizza: PestoRomaBella (I tried to be cool)
-ball of pizza dough, enough for 12 inch round
-1/4 cup of all purpose flour
-olive oil (just have the bottle around....)
-a block of fresh mozzarella (8 oz), sliced
-a roma tomato, sliced
-three small to mid sized portabella mushrooms, sliced
-3+1 tablespoons of pesto

1. Preheat oven to 425 degrees (F) and sprinkle some flour on a clean surface, where you'll knead the dough. Knead the dough till it's not so sticky anymore- which you'll be grateful for when you roll it out. Roll out the dough with a rolling pin (seriously, its just one of those things that doesn't seem necessary, but is totally necessary when no other substitute will do) on the floured surface. I ended up rolling it out into a rectangular shape, so it would fit on a cookie sheet.
2. Transfer flattened/rolled out dough onto a cookie sheet. I like to grease the bottom with olive oil, since it'll prevent sticking mishaps and help the dough brown on the bottom. Win.
3. Spread 3 tablespoons of pesto onto the dough. Cover the dough with cheese, tomato/mushroom slices, and dot some pesto on the top.
4. Bake the pizza at 425 for 12-20 minutes or until crust is nice and brown/crisp (if you like the crust this way..either way it needs to be cooked through). The range is big, I know, but it all depends on how thinly you rolled out the dough in the first place. NOTE: if you want to bake the pizza on the oven rack or on a pizza stone (lucky you, owning a pizza stone!), transfer the assembled pizza onto the rack/stone and bake from there.
5. Suggestions: serve with a nice tall glass of honey lemonade. The acidity helps cut through the richness of the cheesy goo.

missing real brick oven pizza,
HK

Friday, January 6, 2012

still hungry (as usual)

Hello,

Anyone out there? It's been such a long time. I've looked through my pictures and realized I never stopped cooking, so why should I stop documenting my food adventures? At one point, I started to think what's the point. More than once I've been asked how many followers I have or who even reads the blog, to which I answer (at first, somewhat embarrassed) "oh it's just for me and my friends who want recipes for the noms I've made." The usual response was a deflated "oh" and after hearing it a few times, I questioned maintaining the blog. FORGET YOU (not you, because obvi you're reading this- I mean those who thought that keeping this blog was a waste of my time). I created this blog so I can remember and share my "recipes." I do a lot of guestimating when I cook and it's hard to recreate the dishes I've made, not only for myself/ my belly's enjoyment, but also when friends are all up in my grill about the recipe for "turkey bolognese" or "dilled potatoes" or anything else tasty.

So, once again, this blog lives on. I must create a living journal of what I've made so we can all enjoy it next time! What's next?
Pictures of my homebaked pizzas of course!
Mozzarella, vine ripened tomatoes, and baby bella mushrooms.

Whole wheat with pesto, fresh mozzarella, and mushrooms (I have a thing for mushroom pizza, don't judge me).

Garlic herbed crust with bruschetta and homemade Italian (turkey) sausage, served with spring salad in citrus vinaigrette.


Actual recipes will come soon, for real!

om nom nom,
HK

Thursday, April 14, 2011

adventurous: beef picadillo

Picadillo in its first stages

Picadillo after cooking down for 2 hours!
Beef picadillo over quinoa with some pico di gallo on the side

I made a bad choice the other day of going to get groceries on an empty stomach. MISTAKE MISTAKE. anyway, I went to a store in Evanston (I won't name names since I'm not here to promote any grocery retailers) and saw that a certain pasture raised grass fed ground beef was on sale. I DO NOT BUY GROUND BEEF. I think the last time I even contemplated it was when I was 17 and curious about burgers....and as you know I have a thing for ground turkey. I guess the hunger overtook me and I bought 1 1/2 pounds of it. As I checked out, looking at all my impulse buys, I asked myself WHY.

Anyway, I got home, devoured some sushi and tuna salad and looked at my package of ground beef. I kinda regretted it but then thought about all the wonderful things that do indeed taste better once beef is involved. Obviously, I thought about beef picadillo! So, I've had it as a ground beef taco filling type meat before and I remember enjoying it, so I decided to explore recipe options. I modified a Williams-Sonoma recipe and here is the result. It was sweeter and more acidic than I expected, but still yummy. I have given you the modifications to avoid this sweetness and acidity!

Beef Picadillo

1 Tbs. olive oil
2 yellow onion, chopped
1 ½ lb. lean ground beef chuck
4 garlic cloves, finely chopped
2 bay leaves
½ tspn cumin
1 ½ tspn. chili powder
¾ teaspoon ground cinnamon
½ teaspoon ground allspice
1 can (28 oz.) diced tomatoes with juices
1 ¾ cups stock
¼ cup raisins or currants
2 tablespoons tomato paste
3 tablespoons red wine vinegar
Salt and freshly ground pepper, to taste
Suggested side: Quinoa or yellow saffron rice


1. heat olive oil over medium high heat in a deep pan (deep enough to hold all the meat and tomatoes- you'll be doing this all in one pan/pot) and add onions. Cook for 3-4 minutes and then add meat, garlic, and bay leaves. Cook until meat has browned. Pour off excess fat, if any.
2. Add in cumin, chili powder, cinnamon, and allspice next. Cook for one minute.
3. Stir in tomatoes, stock, raisins, tomato paste, and vinegar.
4. Allow to cook down for about 1.5 hours, or until most of the liquid has evaporated and you are left with a thick "sauce." Now, add salt and pepper to taste.
5. Serve over quinoa with a little pico di gallo. This is how I did it and it's lovely!


Exotic beef eating adventures are fun, try it if you eat meat.

yay
HK

Monday, April 4, 2011

the one upper: amaretto rice pudding


Amaretto rice pudding with raspberry coulis

I have never made rice pudding before. In fact, I had never had it before the fundraiser dinner. I'm a huge fan of tapioca pudding, and figured I could try to make rice pudding since I have a huge 25 pound bag of rice in my possession. I browsed around and wanted a special recipe, and spied a lemon and almond rice pudding recipe from food network a la Giada de Laurentiis.  I have made ample changes and here is my version! I served my rice pudding with vanilla yogurt (instead of whipped cream, to be a tad bit healthier) and homemade raspberry coulis (recipe also below!).

Amaretto Rice Pudding
6 cups whole milk
2 cups water
1 cup cal-rose/ sushi rice: washed and drained
3/4 cup sugar
1/8 teaspoon fine sea salt
1/2 cup amaretto liqueur
1 teaspoon vanilla extract (pure!)
1/2 cup milk of your choice

1. Mix together the milk and water in large pot, non-stick is preferred. I'm sure this is like 2% or something, but this is how I did it (probably because it's what I had on hand). I'm sure it'll work with any kind of milk as long as you use 8 cups of liquid for the 1 cup of rice. Turn on the flame to medium. Add rice, sugar, and salt right away (do not wait till milk simmers). STIR this mixture, like you mean it. Give it a chance to heat up.
2. As soon as it starts to look like it will boil, turn down the heat to medium low or low: whichever it takes to get a simmer. This will take a while, expect to periodically check in on the mixture and stir it for the next 35 minutes.
3. Check that mixture is thick and rice is almost done. The goal is rice pudding that isn't hard but not mush either. The best thing to do is taste it and see how you like it, remember it'll cook for another 10 minutes so it should be slightly more done than what you'd want.
 4. Stir in amaretto and vanilla extract. Allow mixture to cook with amaretto for 10 more minutes. Check when time is up to see if you like the consistency. If not, give it a few more minutes.  Once its the way you like it, turn off the flame and remove the vessel from the burner. Stir in the milk. 
5. Refrigerate the rice pudding for at least 4 hours. Look below for suggestions and some notes.

serve with:
1/4 cup sliced almonds, toasted according to directions on package
vanilla yogurt if desired
raspberry coulis! recipe below! so simple!

Raspberry Coulis
1 14 ounce bag of frozen raspberries (This is what I used to make it, I'll update when I try with fresh)
3 tablespoons sugar (up to 1/4 cup if you really want it to be sweet: but give the raspberry tartness a chance!)
juice of one lemon
1/2 teaspoon of flour
2 tablespoons orange juice

1. Put raspberries, sugar, and lemon juice into a small pot and let it come to a boil. Let it boil away until raspberries break down.
2. Mix the flour with the OJ, this will be a slurry used to thicken the coulis. If you want a runny sauce, omit these ingredients and this step. Pour the slurry into the raspberries and mix around; let it come back to a boil.
3. Remove sauce from heat. Blend if desired, but it's nice when it's chunky too!

notes: if you want a fresh acidity to the rice pudding, you can also stir in the juice of 2 lemons when you add the amaretto. I'd suggest you try to make the recipes once without it first since the lemon can be kinda strong.

This was the ultimate one upper. All the attendees said they enjoyed it, so try it for yourself!
There you go, you have 5 out of 5 courses! Don't worry I've been cooking up a storm so more recipes to come soon.

EAT EAT EAT
<3 HK

Thursday, March 31, 2011

main meat course: lemon herbed chicken


close up of the baked chicken, thank you skyler

So, I've taken a hiatus from baking chicken, which is usually a staple in my college kid cuisine repertoire. But, after making this for the fundraising dinner, I'm inspired to prepare food like this again. I have plenty of baked chick recipes, so you just wait!

Lemon Herbed Chicken
marinade:
1 bunch of flat leaf parsley, avoiding stems, chop finely; should equal about 6 tablespoons
6 cloves of garlic finely minced
2 sprigs of rosemary, remove stem and mince up rosemary
2 lemons, juice them then slice them up (save slices for when you actually bake the chicken)
1/4 cup olive oil
1 medium onion, roughly chopped
ok, the chicken. you can use this on a whole chicken, or boneless, or bone in. this is what we used for the dinner: 6 legs and 6 thighs, bone-in with skin on. 

1. mix the parsley, garlic, rosemary, lemon juice, and olive oil. it should be pretty pasty and not so...wet if that makes sense.
2. rub this mixture on to the chicken. best thing for enhanced flavor is to put this stuff under the skin, making direct contact with the meat.
3. let the chicken absorb the flavors, and leave it for a few hours, overnight if possible
4. when you are ready to bake, preheat the oven to 400 degrees, then prepare the pan you are using by lining it with foil.
5. place onions and lemon slices at bottom of pan and place chicken on top of this. drizzle some olive oil on top of chicken to help the skin brown. cover chicken with foil and bake for 30 minutes. then remove foil, increase heat to 450 and bake till skin is browned (maybe 15 minutes, but may vary depending on your preference and oven settings).
6. you can check doneness by cutting into a piece and making sure juices run clear. yum. let the chicken cool for a few minutes and serve with the yummy soft onions.

there it is, the main course. woot woot
yay
HK

Wednesday, March 30, 2011

crowd pleaser: potato and squash gratin


This gratin was a real crowd pleaser. Chris found the recipe for potato, squash and goat cheese gratin from kitchn. I modified it only a tad- here goes!

Potato and Squash Gratin
6-8 red potatoes, depending on how big they are, to get a 50/50 ratio to squash
2 yellow squash
4 ounces goat cheese
1/4- 1/2 cup whole milk
salt and pepper
olive oil
parmesan cheese or breadcrumbs for top

1. wash and dry the potatoes and squash. slice them using a mandoline. aim for 50/50 ratio.
2. put mixture in large mixing bowl, and toss around with olive oil, and salt and pepper to taste
3. layer this mixture on the bottom of the casserole or baking pan you hope you use. aim for a thin layer about two slices thick. put dots of goat cheese throughout. repeat and end with a layer of the squash and potato.
4. this can be made up to a night in advance, so when you are ready to bake preheat the oven to 400 degree. pour up to 1/2 cup of whole milk over the top, depending how deep your dish is: you should have enough milk to almost cover the layers. sprinkle the breadcrumbs or cheese (or a mixture of the two) on top in a thin but substantial layer. cover with foil and bake for 30 minutes. remove foil and bake till top is crusty and brown!
5. let cool for a bit then serve. SUCH A GOOD LEFTOVER

enjoy this. I even used goat cheese, and for those of you who don't know I hardly EVER eat cheese fancier than mozzarella!
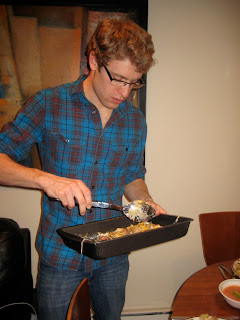
Chris serving up the gratin!