Thursday, April 14, 2011

adventurous: beef picadillo

Picadillo in its first stages

Picadillo after cooking down for 2 hours!
Beef picadillo over quinoa with some pico di gallo on the side

I made a bad choice the other day of going to get groceries on an empty stomach. MISTAKE MISTAKE. anyway, I went to a store in Evanston (I won't name names since I'm not here to promote any grocery retailers) and saw that a certain pasture raised grass fed ground beef was on sale. I DO NOT BUY GROUND BEEF. I think the last time I even contemplated it was when I was 17 and curious about burgers....and as you know I have a thing for ground turkey. I guess the hunger overtook me and I bought 1 1/2 pounds of it. As I checked out, looking at all my impulse buys, I asked myself WHY.

Anyway, I got home, devoured some sushi and tuna salad and looked at my package of ground beef. I kinda regretted it but then thought about all the wonderful things that do indeed taste better once beef is involved. Obviously, I thought about beef picadillo! So, I've had it as a ground beef taco filling type meat before and I remember enjoying it, so I decided to explore recipe options. I modified a Williams-Sonoma recipe and here is the result. It was sweeter and more acidic than I expected, but still yummy. I have given you the modifications to avoid this sweetness and acidity!

Beef Picadillo

1 Tbs. olive oil
2 yellow onion, chopped
1 ½ lb. lean ground beef chuck
4 garlic cloves, finely chopped
2 bay leaves
½ tspn cumin
1 ½ tspn. chili powder
¾ teaspoon ground cinnamon
½ teaspoon ground allspice
1 can (28 oz.) diced tomatoes with juices
1 ¾ cups stock
¼ cup raisins or currants
2 tablespoons tomato paste
3 tablespoons red wine vinegar
Salt and freshly ground pepper, to taste
Suggested side: Quinoa or yellow saffron rice


1. heat olive oil over medium high heat in a deep pan (deep enough to hold all the meat and tomatoes- you'll be doing this all in one pan/pot) and add onions. Cook for 3-4 minutes and then add meat, garlic, and bay leaves. Cook until meat has browned. Pour off excess fat, if any.
2. Add in cumin, chili powder, cinnamon, and allspice next. Cook for one minute.
3. Stir in tomatoes, stock, raisins, tomato paste, and vinegar.
4. Allow to cook down for about 1.5 hours, or until most of the liquid has evaporated and you are left with a thick "sauce." Now, add salt and pepper to taste.
5. Serve over quinoa with a little pico di gallo. This is how I did it and it's lovely!


Exotic beef eating adventures are fun, try it if you eat meat.

yay
HK

Monday, April 4, 2011

the one upper: amaretto rice pudding


Amaretto rice pudding with raspberry coulis

I have never made rice pudding before. In fact, I had never had it before the fundraiser dinner. I'm a huge fan of tapioca pudding, and figured I could try to make rice pudding since I have a huge 25 pound bag of rice in my possession. I browsed around and wanted a special recipe, and spied a lemon and almond rice pudding recipe from food network a la Giada de Laurentiis.  I have made ample changes and here is my version! I served my rice pudding with vanilla yogurt (instead of whipped cream, to be a tad bit healthier) and homemade raspberry coulis (recipe also below!).

Amaretto Rice Pudding
6 cups whole milk
2 cups water
1 cup cal-rose/ sushi rice: washed and drained
3/4 cup sugar
1/8 teaspoon fine sea salt
1/2 cup amaretto liqueur
1 teaspoon vanilla extract (pure!)
1/2 cup milk of your choice

1. Mix together the milk and water in large pot, non-stick is preferred. I'm sure this is like 2% or something, but this is how I did it (probably because it's what I had on hand). I'm sure it'll work with any kind of milk as long as you use 8 cups of liquid for the 1 cup of rice. Turn on the flame to medium. Add rice, sugar, and salt right away (do not wait till milk simmers). STIR this mixture, like you mean it. Give it a chance to heat up.
2. As soon as it starts to look like it will boil, turn down the heat to medium low or low: whichever it takes to get a simmer. This will take a while, expect to periodically check in on the mixture and stir it for the next 35 minutes.
3. Check that mixture is thick and rice is almost done. The goal is rice pudding that isn't hard but not mush either. The best thing to do is taste it and see how you like it, remember it'll cook for another 10 minutes so it should be slightly more done than what you'd want.
 4. Stir in amaretto and vanilla extract. Allow mixture to cook with amaretto for 10 more minutes. Check when time is up to see if you like the consistency. If not, give it a few more minutes.  Once its the way you like it, turn off the flame and remove the vessel from the burner. Stir in the milk. 
5. Refrigerate the rice pudding for at least 4 hours. Look below for suggestions and some notes.

serve with:
1/4 cup sliced almonds, toasted according to directions on package
vanilla yogurt if desired
raspberry coulis! recipe below! so simple!

Raspberry Coulis
1 14 ounce bag of frozen raspberries (This is what I used to make it, I'll update when I try with fresh)
3 tablespoons sugar (up to 1/4 cup if you really want it to be sweet: but give the raspberry tartness a chance!)
juice of one lemon
1/2 teaspoon of flour
2 tablespoons orange juice

1. Put raspberries, sugar, and lemon juice into a small pot and let it come to a boil. Let it boil away until raspberries break down.
2. Mix the flour with the OJ, this will be a slurry used to thicken the coulis. If you want a runny sauce, omit these ingredients and this step. Pour the slurry into the raspberries and mix around; let it come back to a boil.
3. Remove sauce from heat. Blend if desired, but it's nice when it's chunky too!

notes: if you want a fresh acidity to the rice pudding, you can also stir in the juice of 2 lemons when you add the amaretto. I'd suggest you try to make the recipes once without it first since the lemon can be kinda strong.

This was the ultimate one upper. All the attendees said they enjoyed it, so try it for yourself!
There you go, you have 5 out of 5 courses! Don't worry I've been cooking up a storm so more recipes to come soon.

EAT EAT EAT
<3 HK

Thursday, March 31, 2011

main meat course: lemon herbed chicken


close up of the baked chicken, thank you skyler

So, I've taken a hiatus from baking chicken, which is usually a staple in my college kid cuisine repertoire. But, after making this for the fundraising dinner, I'm inspired to prepare food like this again. I have plenty of baked chick recipes, so you just wait!

Lemon Herbed Chicken
marinade:
1 bunch of flat leaf parsley, avoiding stems, chop finely; should equal about 6 tablespoons
6 cloves of garlic finely minced
2 sprigs of rosemary, remove stem and mince up rosemary
2 lemons, juice them then slice them up (save slices for when you actually bake the chicken)
1/4 cup olive oil
1 medium onion, roughly chopped
ok, the chicken. you can use this on a whole chicken, or boneless, or bone in. this is what we used for the dinner: 6 legs and 6 thighs, bone-in with skin on. 

1. mix the parsley, garlic, rosemary, lemon juice, and olive oil. it should be pretty pasty and not so...wet if that makes sense.
2. rub this mixture on to the chicken. best thing for enhanced flavor is to put this stuff under the skin, making direct contact with the meat.
3. let the chicken absorb the flavors, and leave it for a few hours, overnight if possible
4. when you are ready to bake, preheat the oven to 400 degrees, then prepare the pan you are using by lining it with foil.
5. place onions and lemon slices at bottom of pan and place chicken on top of this. drizzle some olive oil on top of chicken to help the skin brown. cover chicken with foil and bake for 30 minutes. then remove foil, increase heat to 450 and bake till skin is browned (maybe 15 minutes, but may vary depending on your preference and oven settings).
6. you can check doneness by cutting into a piece and making sure juices run clear. yum. let the chicken cool for a few minutes and serve with the yummy soft onions.

there it is, the main course. woot woot
yay
HK

Wednesday, March 30, 2011

crowd pleaser: potato and squash gratin


This gratin was a real crowd pleaser. Chris found the recipe for potato, squash and goat cheese gratin from kitchn. I modified it only a tad- here goes!

Potato and Squash Gratin
6-8 red potatoes, depending on how big they are, to get a 50/50 ratio to squash
2 yellow squash
4 ounces goat cheese
1/4- 1/2 cup whole milk
salt and pepper
olive oil
parmesan cheese or breadcrumbs for top

1. wash and dry the potatoes and squash. slice them using a mandoline. aim for 50/50 ratio.
2. put mixture in large mixing bowl, and toss around with olive oil, and salt and pepper to taste
3. layer this mixture on the bottom of the casserole or baking pan you hope you use. aim for a thin layer about two slices thick. put dots of goat cheese throughout. repeat and end with a layer of the squash and potato.
4. this can be made up to a night in advance, so when you are ready to bake preheat the oven to 400 degree. pour up to 1/2 cup of whole milk over the top, depending how deep your dish is: you should have enough milk to almost cover the layers. sprinkle the breadcrumbs or cheese (or a mixture of the two) on top in a thin but substantial layer. cover with foil and bake for 30 minutes. remove foil and bake till top is crusty and brown!
5. let cool for a bit then serve. SUCH A GOOD LEFTOVER

enjoy this. I even used goat cheese, and for those of you who don't know I hardly EVER eat cheese fancier than mozzarella!
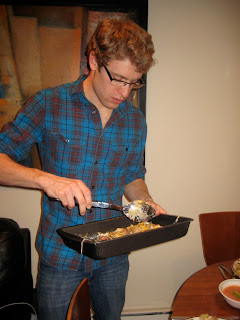
Chris serving up the gratin!


Sunday, March 27, 2011

chilled tomato avocado soup

So, this was actually the appetizer for the fundraising dinner. It was inspired by the cold avocado and tomato soup recipe from the June 1993 issue of Bon Appetit that I found on Epicurious. here we go.

Chilled Tomato and Avocado Soup
1 lb ripe roma tomatoes, roughly chopped
1 cup roasted red peppers (the kind that come in a jar in that mysterious liquid)
2 teaspoons sugar (I used turbinado)
3/4 cup buttermilk
3/4 cup low sodium chicken broth
1 large cucumber, roughly chopped
1 ripe avocado
salt and pepper to taste
4 cloves garlic
avocado slices for GARNISH if desired

This is simple:
1. add all ingredients (except garnish you silly goose) to blender. blend till smooth! make sure you taste it before you serve it. chill if necessary
Notes: the original version of this recipe is really thick and this is a thinned out version. if it's still too thick for you, add more cucumbers and chicken stock! if making for vegetarians, use vegetable stock.

yes! you are 40% to a 5 course meal. see what I did there?
<3 HK

Saturday, March 26, 2011

fundraising dinner recipes are here


The recipes are finally here! so, just in case you didn't know I hosted a fundraising dinner with my Dance Marathon partner to raise the money we needed to dance. special thanks to everyone who participated by donating and/or coming to the dinner! yay.

It was a five course dinner and the accompanying recipes will come one at a time. We will begin with the quinoa garbanzo salad!! it was modified from a recipe I found on epicurious from the july 2010 issue of bon appetit.


Garbanzo Bean and Spinach Quinoa Salad
1 1/2 cups of uncooked quinoa, washed then drained
3 cups baby spinach leaves, washed and thoroughly dried
1 LARGE can of garbanzo beans, about 24 ounces, rinsed and drained
2 cucumbers, partially peeled, quartered and diced
2 medium tomatoes, chopped (or 1 pint halved cherry/grape tomatoes if you like these better)
1 cup mint leaves

dressing:
1/4 cup red wine vinegar
2 teaspoons paprika
pinch salt
pinch black pepper
1/8-1/4 cup olive oil, depending how tart you like your dressing

1. cook the quinoa according to directions on package; usually 1 part quinoa to 2 parts water/liquid, let boil, then simmer for 15 minutes. season the water if not using a fancy liquid like stock. let the quinoa drain well
2. mix all salad ingredients together, add cooled quinoa; DON'T ADD MINT YET
3. make the dressing by combining first 4 ingredients, then slowly drizzle in oil to make cute emulsion. I don't like so much oil in my dressing so I do twice the amount of vinegar to oil.
4. pour dressing over salad mixture and add the mint RIGHT BEFORE SERVING or else it will be black and wilty which is gross.

enjoy and more recipes to come.

<3 HK

Sunday, February 13, 2011

stay tuned- 5 course dinner just happened

for real, the 5 course dinner picture and recipes will be made available one post at a time starting very soon!

Wednesday, February 9, 2011

Helen's glorified fudge


OK

So I always talk about my brownies, which I lovingly refer to as glorified fudge. Why is that Helen? Funny you ask...it's because I love my brownies super chewy, stick to your teeth, chocolatey and underbaked. And YES they are delicious this way! They are made with barely any flour, and if you eat them hot out of the oven, you better use a spoon because it is literally just like warm fudge.

Really, make them yourself. This is my own recipe that I have perfected after much trial and error, so I promise it is no fluke! I will admit I was inspired by a former co-worker who was attending culinary school. Shout out to Liam just in case you ever see this.
If you are really nice to me or if I'm feeling really nice, I'll make these for you as a gift from my heart. <3


Glorified Fudge
1 stick sweet cream butter (also known as unsalted)
1 bar semisweet baker's chocolate (about 3.5 ounces or 100 g)
1 cup (or 1 1/4 cup if you like things sweet...but brownies are about the chocolate and candy is about the sweet, right?) granulated sugar
2 eggs MUST BE ROOM TEMPERATURE
1 cup flour
1/2 cup (two handfuls....if you have hands my size) chocolate chips
1/2 teaspoon vanilla extract (PURE, HK does not play games)

create
1. Preheat oven to 360º F. Get a 9x13 or 8x8 pan ready by buttering it up.
2.  Melt butter with chocolate, I use the microwave most of the time, but I have done the double boiler before when I feel inspired. Either will work,
3.  Transfer butter chocolate goop to mixing bowl and add sugar. Stir until well mixed. Sugar doesn't have to melt. And, most of the time, it won't.
4. Carefully temper and incorporate the eggs into butter/choc. How do I do this? Take a small amount of butter/choc mixture and stir into room temperature eggs. Then, stir this mixture back into the mixing bowl with the rest of the butter/choc.
5. Optional: stir in vanilla if you want to use it. I can never tell the difference myself, so it's up to you.
6. Stir in chocolate chips. This is not optional.
7. Spread batter evenly in a baking tin and bake for 16 minutes if using the 9x13; 20 minutes if using the 8x8, or until the top is slightly cracked if your oven is uneven/messed up.
Note: baking for this suggested amount of time will leave you with GLORIFIED FUDGE, but if you want real brownies you can add on 2-3 extra minutes of baking time. But, let's be real who wants that?


The secret recipe is out.

just eat,
HK

PS- shoutout to Sky my baking buddy on this project. Props to her for baking with me and taking/providing the picture.

Sunday, February 6, 2011

Helen's attempt at Thai Green Curry


Hello!

There are just times when I crave Thai green curry. This craving struck me last week when I happened to have thai green curry paste and some Asian ingredients in the fridge. I proceeded to go for it and make a lovely curry. So, the curry paste I found was pretty legit. Like spicier than I thought and a little went a very long way. So, when you carry on with green curry adventures of your own, please start with a little of the green stuff and work your way up...since you probs don't want to burn a hole in your face!

Helen's Attempt at Thai Green Curry
1/2-1 tablespoon of Thai green curry paste. I got it from an Asian market, it has a Thai label so sorry I can't help with letting you know a brand...but isn't it a good sign that there's no English on it?
smidge of oil, maybe a teaspoon
1 can of coconut milk (I used low fat because I don't like my green curry to taste like slightly spicy coconut fat, but if this is your thing go for the regular full fat version)
1/4 - 1/2 cup chicken stock (could be optional, read below)

my curry add in's
2 Japanese eggplants (partially peeled, sliced on a bias and then into finger sized strips, and lightly sauteed in vegetable oil till slightly browned)
Firm, crispy skinned tofu (you can find this in Asian markets. Make thin slices. If you want it extra crispy, go ahead and saute this in some veg oil too, until brown and even more crispy!)
1 can of baby corn (rinsed, drained, and I go ahead and blanch them to get rid of the "tin" taste)
1/2 a pepper, 1/2 an onion, 2 cups of mushrooms (cook this together in some sort of fat. butter, oil, your choice, till its nice and brown and the mushrooms have lost a good amount of liquid)
1/3 cup of peas/carrots (this is straight up American of me, I won't even pretend. I had it on hand. don't use it if you hate peas or carrots or both
handful or two of thai basil leaves, depending on how obscene you want the basil flavor to be
depending on if this is the vegetarian meal or not...and depending on if I have leftovers to use, I add in some precooked chicken bits. yum.

make it work:
1. Fry the curry paste in the oil for literally 30 seconds or so, and then add the coconut milk. Stir to incorporate the curry into the coconut milk. This will be your yumtastic curry sauce. Let this simmer in the corner if you need to prepare the other stuff, like cook the eggplant or crisp the tofu. Make sure you taste your mixture. Too much curry? too intense? too much coconut? add the stock! not spicy enough? add more paste GRADUALLY. And keep in mind, this is going to cook down so flavors do concentrate....
2.  Dump in the add-ins. Is there an order? Well, think about what you want to soak up the most curry flavor and what you don't want to be a soggy, gross mush. For real, this can happen. I usually put the tofu in first, let it simmer for 3 minutes, then dump all the rest of the stuff.
3. Let this mish mash of curry stuff simmer for another 5-10 minutes on low, until the little bits have soaked up just the right amount of curry (which is obvi based on preference)
4.  I can imagine eating this by itself, but I like rice, so I serve it over rice. yumsville.


HK

Tuesday, February 1, 2011

late night hashbrowns- mistake or genius?


Since the day I moved in to my current house, I spied a bag of hashbrowns in the freezer. Like, it hung out in the freezer and practically taunted me. They have gone unclaimed for about 3 months and trust me, it took a lot of self control to not just cook them. I'm really into hashbrowns.

I don't know exactly inspired it, but my housemate Hillary suggested that we just cook them. It was 11 pm and I guess it was time for an almost midnight snack. We threw it together and enjoyed it while watching "I Used to be Fat" (because "You're Cut Off" wasn't on).  Try out this creation if you too have a bag of mysterious hashbrowns chilling out in your freezer (whoa, I just made a funny and didn't even try).

Hil and Hel's Gross-good Hashbrowns
1 tablespoon of veg oil and an obscene amount of butter (at least 2 tablespoons)
1 bag of frozen hashbrowns. this is what we used, but I'm sure you could be a real person and grate the potatoes yourself or use something of a higher quality than what we used. ha
2 small onions roughly chopped up
1/4 bell pepper chopped up
cheese of your choice (pinch, fistfull, whatever!)

Lets the l-o-l's begin
1. Heat up the oil/fats in a large pan
2. When butter starts to sass you and make noises or smell nutty, add the onions and peppers. Let them fry around for about a minute.
3. Add the hashbrowns. cook to your liking. I like mine really brown and this took an amount of time that I do not quite remember since Hil and I were chatting away. 10 minutes?
4. After hashbrowns are browned, add cheese. how much? who knows. Which kind? I did mozzarella but I'm sure many other cheese options would be good too
5. Serve it with salsa or be a real college kid, and eat it with packets of ketchup you stole from BK.

giggles
HK

Friday, January 21, 2011

meat craving- taco turkey burger with fiesta salad!


Hey all,

Since I'm doing this whole vegetarian two meals a day thing, I noticed I get really intense but semi random meat cravings. So, for that one meal when I indulge in meat, I want to make it count.
Last week I had such a craving for burgers. I really love burgers and I happened to have ground turkey and some select seasonings, and thought it was time to experiment with a taco turkey burger!

Taco Turkey Burger
(this is for two servings, so good for a date or for a relaxed dinner and easy packable lunch the next day)
8 ounces ground turkey- I prefer breast, 93/7
fairly small onion chopped up
3 cloves garlic minced
1 tablespoon oil of your choice
1-2 tablespoons chicken stock
1/2 packet of sason
1/2 -1 tablespoon of taco seasoning (depending on how salty and taco-ish you like it)
black pepper to taste

suggestions: serve on toasted sesame seed roll, like I did.
use a bit of black bean and corn salsa AND sliced avocado for that extra awesomeness, like I did.

this is what you do:
1. Mix the above ingredients together. Don't over work the meat. Be extra cool and let this mixture marinate overnight. it'll be a damn good burger if you have patience, but its damn good either way.
2. When you are ready to cook, split meat in half to form two patties. Shape them accordingly (thin if you want it to cook faster, thicker if your buns are...smaller? hehe )
3. Get a pan ready. Get out the big guns cast iron if you have one. If you are poor collegiate kid like me, get out the non stick. Coat with the thinnest, wispiest layer of cooking spray. When pan is moderately hot put that bad boy in.
4. Let the burger sear and cook on the first side for 4 minutes. Flip over and let it cook for 3 minutes on this side. It should be done by now....but if you are paranoid cut it open and check it. Really- you CANNOT eat a turkey burger any less than WELL DONE
5. Toast the buns/roll/starch you will put the burger on. Garnish with the black bean/corn salsa. Cut up an avocado if you are feeling fancy!!!
6. Eat and enjoy...if you feel a bit guilty eat this with a fiesta salad...

Fiesta Salad
your favorite salad mix
black beans (canned is fine, as long as you drain, rinse, and pat dry)
sweet corn
salsa
^mix it together and eat this with something that involves tacos; heck use this as a base and REPLACE the bun you carbophobe!!!!

Tabete,
HK

Tuesday, January 11, 2011

vegetarian in nature: pesto pasta salad


I started this new year by making a promise to not eat obscene amounts of beef (like I do when I go back home and the first meal I request is braised beef shins, but I digress). When I'm here in etown I try to only eat turkey or chicken if I'm going to have meat at all, but I decided to one up myself! Now, I have 2 vegetarian meals a day. So far, so good.

This is my first attempt at a strictly vegetarian meal. It's loaded up on veggies so I'm not tempted to chop up kielbasa or some other cured sausage product and throw it in there, so yes: the vegetable to pasta ratio is like 50:50.

Pesto Pasta Salad
1 1/2 cup fusilli (I went badass and did regular pasta, not whole grain, but I've done the whole grain before and it works the same)
3 tablespoons pesto*
1 tablespoon oil (whatever you like to cook with)
4 cloves garlic, chopped
1 1/2 cup vegetable medley of your choice (I did peas, carrots, and sweet corn)
1 cup sliced mushrooms (I used button but baby bellas would be nice)
1/4 roasted red pepper, diced
*I usually don't do the premade thing but sometimes its just more practical for my collegiate cooking to get things like premade pesto. If you want to make your own, please do! Alas I did not but the end product was still tasty.

Do it:
1. Boil a big ole daddy pot of water for the fusilli. That should be the first thing you do when you make pasta, before you even touch or wash any accoutrement for it. Maximize your utility minimize stove time. Is that my slogan now?
Use your peripheral vision and check to see when water boils. Salt the water liberally and add the fusilli. Cook according to directions on box.
2. While you wait for the water to boil get the vegetable medley ready. For example, if it is frozen, rinse and let drain.
3. Heat up a saute pan with the oil on medium heat. Maybe it's a wives' tale but I don't like to heat up my nonstick with nothing in it; I put the oil in first then that pan on the stove. When the oil is way hot, add the garlic. Let it get brown, obvi don't let it burn but let it get as close as your cooking anxieties allow. This is when you add the vegetables. Saute them around and add salt to taste if you like salt on your food (seriously, some people don't do salt). Transfer vegetables to a vessel of your choice.
4. In this same pan: take a look. Is there residual oil? If so, throw the pan back on the stove and put the mushrooms in! If not, add a few drops of oil, then put the pan on the stove and add shrooms. I like my mushrooms browned, so leave them in until this happens (on medium heat about 3-4 minutes). Once again, salt if desired.
5. If your timing is awesome, your pasta will be ready just about now. Whenever its ready: drain it.
6. In the minute it takes for pasta to drain, get your mixing bowl out. Spread the pesto around the inside of the bowl. Why? Because its easier to incorporate the thin layer of pesto into the pasta as opposed to a 3 tablespoon sized glob. Let's level here, its like putting the dressing at the bottom of the bowl pre-toss.
7. Toss in the HOT pasta (really, it needs to be as hot as possible for it to absorb the pesto goodness) till its nicely coated in the green stuff. Now add the vegetable medley, mushrooms, and roasted red pepper. If you hate the taste of pepper, leave it out. There is only a 1/4 of it for a reason.
8. Enjoy! Can be served hot or cold! Wow!
Suggestions: I eat this on a bed of kale when I'm feeling extra veg-head. If you are patient, it is one of those dishes (like curry) that tastes better the next day- perfect for packing a lunch or making one cooking sesh span multiple meals.

Comer!
HK

Friday, January 7, 2011

2010- A food tribute

Hello! I have failed since the launch of Second Trimester Food Baby (STFB) at posting my culinary adventures. I did indeed cook, eat, and on occasion take pictures of my creations. Here are some snapshots of the glorious food I made and/or ate in 2010.
Note:  I cooked a lot more than what you may think from looking at these 6 pictures, I promise. I'm bad at documenting my food making adventures but I'll be a lot better about that from now on. Also, no recipes yet but if you are interested in making any of the below let me know and I'll be happy to share!


A French inspired cooking adventure with Nick. Above: potato pancakes with baked eggplant and red pepper "ragu" served with creme fraiche and dill; below: glorious pan seared ribeye with side of kale chips


Homemade spaghetti bolognese: the surprise? It's turkey bolognese. Trust me, you won't even miss the beef.

Thanksgiving smorgasboard that I created with Michelle. Clockwise (starting after the stack of plates)- Asian bbq marinated and glazed turkey (the dark meat) served with the turkey bacon I baked it with (picture of whole turkey is somewhere...I'll find it), the white meat on a separate platter, buttermilk biscuits, chilled corn salad, primavera vegetables, mushroom/carmelized onion sage stuffing, and my first attempt at "candied yams" even though they weren't too sweet and were in fact sweet potatoes. In the center is dill and garlic smashed red potato salad. It was a 7 hour cooking fest!

^Yours Truly^

Moving forward I promise to be a better blogger. I'll post up some oldies but goodies of my never fail go-to dishes, picture and recipe included, very soon I promise! I'll make sure to keep you all in my culinary loop.

mangia
HK